- Size 12″ long x 10″ wide x 3″ deep
- When- Saturday, June 20th, 11-3; please bring lunch with you
- Where- Church of Burns Park 11-3
- If you have questions, email me at admin @ hmjoriginals.com (c/p and remove spaces)
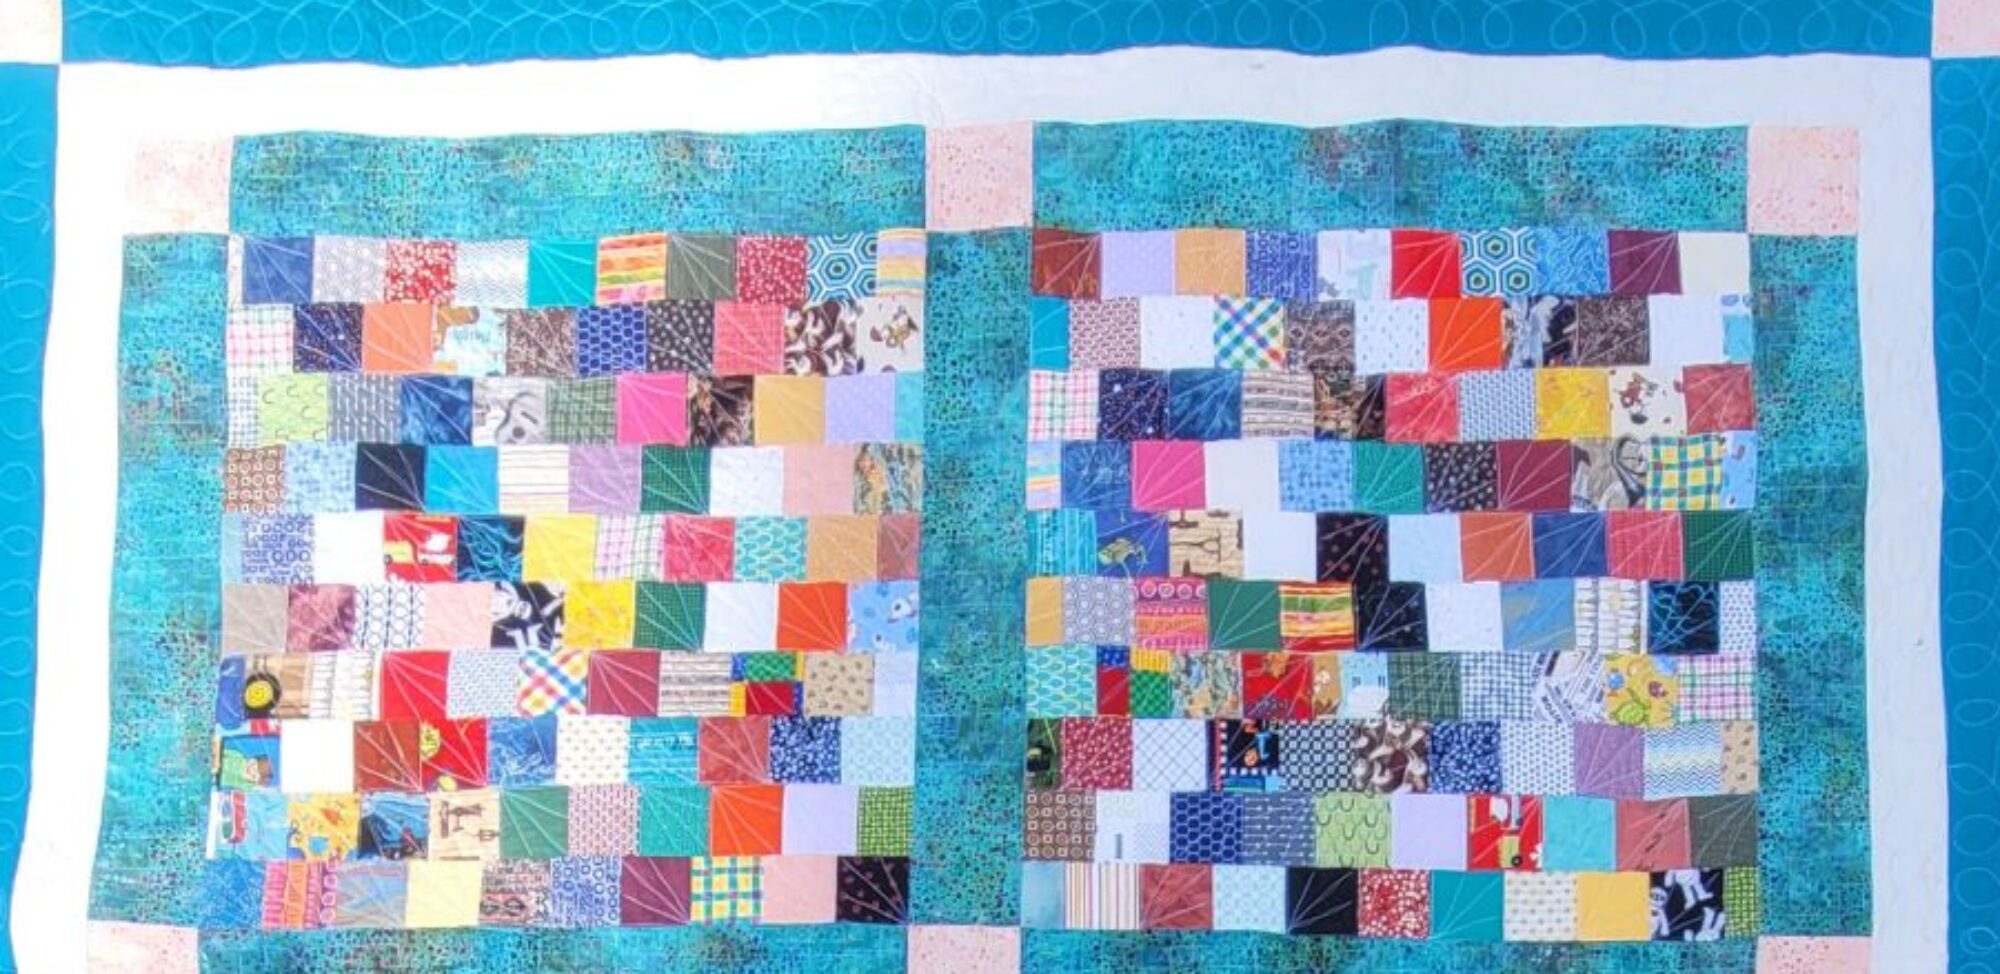
The Little Darling Purse

This purse is the perfect size for everyday life. It has a clean look that will showcase a big, bold pattern or quilting. You can make it be wider or taller, depending on your preference and fabric selection. The instructions will be for a 10″ x 12″ purse.
The closure is a zippered flap set.
There are 2 pockets inside the purse for an easy grab-and-go life.
The straps are two-tone, but we will start off with one color.
Little Darling Purse is wide enough in the inside to hold a book or Bible.
Optional add-ons are a key fob and a piped edge. There are video links on how to make them if you would still like to add them to your first bag.

One side pocket has a stitch line 2″ from one edge for a pen or pencil with the rest of the pocket being open.
The other pocket has a stitch line down the middle with two pockets on either side. These are perfect for a phone, glasses, or a wallet.
Everything about this purse is completely customizable. I highly suggest making it as instructed in class.
Once you understand the basics, you can adjust the bag to fit your needs.

Fabric Requirements-
- Exterior- non-directional fabric- (24″) 2/3 yard; for directional fabric down the length of the grain, you will need (40″) 1.25 yards; for the class, please get 100% quilting cotton
- Lining- 1 yard, please get 100% quilting cotton
- Accent (POP color)- 6″ x 6″ scrap OR, if you are doing piping, you need 1 fat quarter. If you don’t want the key fob or zipper tab to pop, cut from the exterior fabric instead. Please get 100% quilting cotton.
- Interfacing- (60″) 1.5 yards of 20″ wide, woven is suggested, non-woven is okay. There is less wide interfacing online, you need at least 14″ wide- get a full 2 yards.
- Foam- (36″) 1 yard- non-fusible highly suggested
Don’t want to shop around? I have a limited number of kits for $34.00 that are made up with these items:
- 2 yards woven interfacing
- 1 yard ‘naked’ foam
- 3 1/2 yards of 1/4″ thick cording
- and 1 lobster clasp (gold or silver tone)
Contact me if you would like to purchase one of the kits. This should be done before class so you can still get the prep work completed.
Here are links if you would like to buy from Amazon. I have signed up as an Amazon Associate but I’m not sure it will kick in-

By Annie’s Soft and Stable-
This has a lot of great reviews and I have friends who use this exclusively-

Bosal in-r-form unique sew in foam stabilizer-
I’ve heard of it and have seen/touched it. Other people swear by it. It does have fusible on one side.

Pellon Stay Flex woven interfacing- 2 yard pack-
This is my go to… when I can find it-
Plantional Woven interfacing- 16” x 10 yds-
I picked this up recently and it works. You can see this in the video.

Piping cord- 6mm/1/4″-
Pastel colors- https://amzn.to/4vjZheZ
Vital cozy ¼” natural color- https://amzn.to/4ajGZ5t

Lobster clasps-
silver and gold, two sizes-
Other notions-

- 14+” zipper in the color of your choice
- 7/8″ grosgrain ribbon- any color, it will not be seen
- Matching or contrasting thread for the exterior, lining, and accent fabrics- 2 bobbins for exterior fabric thread color, 1 bobbin for lining thread color, and 1 bobbin for accent thread color. If you use the same color throughout, 3 bobbins will be fine.
- Size 14 needle- bring extra
- Zipper foot
- Key ring or large lobster clasp (optional)
- Stitch witchery (helps but is optional)
- Cording for piping (optional). My first cord was mop strands from a new mop head I bought at the Dollar Tree, cut apart and laid end to end.
Acronyms-
- (#)- number count needed
- E- exterior fabric
- L- lining fabric
- I- interfacing
- F- foam
- A- accent fabric
To read- Cut (2) E, L, I, & F – means to cut 2 each out of Exterior, Lining, Interfacing, and Foam.
Other terms used-
- RS- right side- face up/pretty side of the fabric
- RST- right sides together- pretty sides together, usually when stitching your seams
- WS- wrong side- back side of the fabric, when you bookend, you will fold the raw edges to the wrong side of the fabric
- WST- wrong sides together- back sides together- usually turning things right side out
- RSO- right side out- pretty side is facing outward, as it would be ‘in use’
- WSO- wrong side out- pretty side is facing inside, usually when sewing the bag top seam
- TS- topstitch- 1/8″ away from an edge; the straps will be TS 1/8″ and 1/4″ on each side, usually done to finish out a section
- SS- Stay stitching- 1/8″ from the edge so the stitch line won’t be seen once the bag is sewn, usually done in process
- Ease- to snip the fabric in the seam allowance to allow for expansion while going around corners
Before class:
When you read down the instructions for the class prep, this might look like a lot for a beginner. Go slow, and work on it section by section. I have videos for every step to help you along. If you get stuck, email me at- admin @ hmjoriginals.com -(copy/paste and remove spaces)
The reason I have listed so much preparation before the class is that there won’t be a class over the summer. The zipper part is fiddly the first few times and will take time to go through.
The prep work could be done inside class, but you would have to wait for another class in the fall to complete the bag. Or, you can do the prep work beforehand and enjoy using your bag all summer long.
To do before class-
- Have all fabric and notions in hand
- Have all the pattern pieces cut out and the interfacing pressed on the back. It might help to keep everything straight if you print off the cut diagram pages and cut out the shapes to pin to the pieces once cut.
- Have the quilting completed for pieces 1, 3, and 4.
- Have the pressing done for all other pieces.
- If you want to do more to get your bag closer to the construction stage, follow the instructions and videos at the very end.
Don’t have a machine at home?
If you cannot quilt your pieces before class, let me know by June 17th at – admin @ hmjoriginals.com -(copy/paste and remove spaces)
I will arrange to meet you at the church an hour (at 10 am) before class (at 11 am) to do the quilting and final cutting out for 1, 3, and 4.
You must have all pieces cut and the interfacing pressed. Piping will not be covered on this day.
I am still adjusting the instructions below. If this paragraph is gone, the pre-class instructions have been finalized. The cut list has been finalized; I am just finishing out the videos.
The links are to specific videos or to products that I suggest but do not insist on. I am not currently an affiliate of anyone. If I do sign up for product affiliations, I may receive a small commission, but your price does not change.
I like to keep my project together in a tote bag or a shoebox. I place everything for the bag- thread spools, hardware (zippers, rings, cording), and fabric in there so it is all in one place.
My purse will be landscape and the instructions will follow this orientation.
Cutting-
I frequently break up my bag-making into sections to keep it from being overwhelming. I would cut one night, press one night, quilt the next night, and then start construction the next night. So take it step by step.
We are using the cut-then-quilt method. This means you will cut out each piece before quilting. Review the cutting diagrams for each fabric- Exterior, Lining, Foam, Interfacing, and Accent when cutting out that fabric. You can print off the diagrams and cut them apart to pin to your pieces if that helps.
The cut-then-quilt method has you cutting oversized pieces that will be quilted, as quilting may shrink the overall size. Once quilted, the piece will be trimmed to size.
You can stack E, I (at 20″ wide), and F together and cut them at the same time for pieces #’s 1, 3, and 4. These three pieces have been grouped in the same place on each diagram to help facilitate these cuts. Watch the video to see how I cut mine.
Once those pieces are done, cut the remaining pieces from the fabrics specified-
- #2- (4) L & (2) I
- #5- (1) E
- #6-8- (1 each) A or, if you aren’t using an accent fabric, cut them from the exterior fabric.


Pressing-
Press the interfacing to the foam for #1, 3, and 4 and let cool flat. If you move the interfacing too much while it’s warm, it could separate from the foam. Lay it flat for at least 30 minutes before using it. If you want to do as much as possible in one setting, press these first before the others.
Press the (2) #2 interfacing to the back of (2) #2 linings and let cool.
We will use the bookend method (or a double fold) for #’s 5 (strap) and #6 (key fob). Here is a video on how to do that to watch or you can follow the instructions below:
- Fold on the long edge in half WST and press.
- Take the 7/8″ wide ribbon and lay it along that center fold. You can use stitch witchery along the whole ribbon or place a 1″ piece every 3-4″ along the length. Give it a good press, then repress the center fold again if it was pressed out.
- Open it up and press each raw edge to the center (still on the long sides) and press the folded edge. Fold it closed with the raw edges and ribbon on the inside, the strap (#5) should be 1″ wide and the key fob (#6) should be 1/2″ wide.
- You can pin or clip them both closed to cool. This gives the fabric ‘memory,’ and it will help when stitching later on.
For # 7- The process is similar to a bookend fold, but slightly different. You are making a tab to go over the zipper end. Here is the video for this step and the instructions below:
- Fold in half on the short side and press, then unfold.
- Fold the long sides 1/4″ to the WS and press, then unfold.
- Repeat the fold and press for the short sides. There should be no raw edges visible once everything is folded up. Pin to keep it folded.
For #8- optional piping with 1.5″ strips- here is a video on how to fold and cut out on the bias and below are the instructions on how to finish it out:
- Sew all of the strips together on the diagonal
- Press seams open to reduce bulk for sewing
- Fold in half on the long side and insert the cording.
- SS down 1/8″ from the cord in matching thread to hold it in place.
Quilting-
You will need to quilt #’s 1, 3, and 4. for the outside of the bag.
- For each piece- lay the interfacing facing down with the foam face up.
- Place the exterior face up on top of the foam and check all sides to make sure that they line up.
- Pin around the edges and only have one pin in the middle to help the pieces not to shift.
- You have now made a bag sandwich and are ready to quilt.
With the size 14 needle in your machine- this is a lot of bulk to go through, and your machine needs the larger eyed needle.
Decide on your design. It is your choice, and I have a video here, but some ideas are:
- Around a graphic in the design, like a flower or object,
- Grids- regular or on point (called cross hatching),
- Lines following the print,
- Abstract lines just going across in different directions.
Once quilted, get out your ruler and mark the trim line:
- #1- mark 12.5″ wide x 10.5″ tall
- #3- mark 34″ wide x 4″ tall
- #4- mark 4″ wide x 11.5″ tall and draw a line 2″ for the middle down the 11.5″ edge. This is a cut line to separate the flaps.
Orient the #1’s to the top and bottom so you can cut the curve at the corners:
- Using a cup, can, or other rounded object, lay it on the bottom corner so it sits against the two lines- side and bottom.
- Mark the arc from the bottom to the side.
- Repeat on the other side.
Before you cut each piece out, take it back to the machine and SS inside that line all the way around each piece, including the new corners for #1.
Then cut each piece out at the marked line. The SS will keep all three pieces together during construction.
Mark the middle of all 4 sides for #1 and #3, and both long sides for #4.
This is the end of what needs to be completed before the class. These steps can take 2 or more hours to complete. Watch the videos and email or if you run into problems or have questions.
If you wish, you can also complete the next steps to get ahead of bag construction before you get to class.
Pockets-
Here is a video to watch for the pocket construction. Other than adding the piping, the construction steps are the same.
If you are piping, you will stitch the piping to the top edge on (2)#2 pieces. For those not doing piping, do the same steps, just without the piping.
- Align the top raw edges together for piping and (1) #2 with the interfacing, stitch 1/8″ away from the cording to baste it on. Repeat for the other #2.
- Lay a second #2 on top without the interfacing, RST, and stitch as close as you can to the cording.
- Press the seam, but be careful not to press the cording.
- Flip up the top #2 and press the fold right under the cording- this gives that fold a solid press.
- Flip the pocket so the fabrics are WST and press again- this gives this fold a solid press.
- Topstitch (TS) just under the cording fold.
- Mark top to bottom in the center of one pocket, and on the other pocket mark 2″ from one side top to bottom. These will be for the pocket divider stitch lines.
- On each pocket, mark 1″ down from the top on both sides and 1/2 inch in from each bottom corner. Draw a line from mark to mark for the new side
- Mark an arc from the bottom edge to the new side edge using the object you used to mark the exterior fabric with.
- Cut off the excess fabric outside that line for all 4 corners. This is the easiest way to give you room at the top of the pocket without adding extra bulk in the seams.
Strap-
Your strap should be already been folded bookmark style. Time to finish it out, here is the video and instructions to follow:
- TS down the folded edge 1/8″; repeat on the folded side. Go slow and raise your pressure foot often to prevent the fabric from bunching ahead of the foot and pulling the strap out of alignment.
- TS a second line 1/8″ away from the first, closer to the middle, repeat on the other side. This one will stitch onto the ribbon center and help prevent stretching over time.
- You can do more stitching if you wish. The more stitching there is across the ribbon, the more stable it will be.
Key fob-
Fold #6, the key fob-
- This is already bookended, so starting on the folded side and TS down both sides 1/8″ from the edge.
- Thread the key ring or lobster clasp to the middle of the strap and pin.
- Stitch across the strap as close as you can to keep the item from shifting.
- TS down the center of the fob to keep both sides together.
Exterior with piping-
For those of you who are piping, you need to sew piping onto the sides and bottom edge of both exterior #1’s. Here is the video. If you are not doing piping, you are ready to go.
- Line up the raw edges at the top on one side and pin the piping down the side, across the bottom, and back up to the top again. Cut it at the top edge.
- Repeat for the other #1.
- TS the piping on 1/8″ from the edge for both. You might need to do relief snips in the bias around the corners to ease in the piping so the bias doesn’t wrinkle.
- That is it.